Clique Kits

Click. Connect. Create.


Leave a comment

Go Outside & Play

CK - Art Studio header

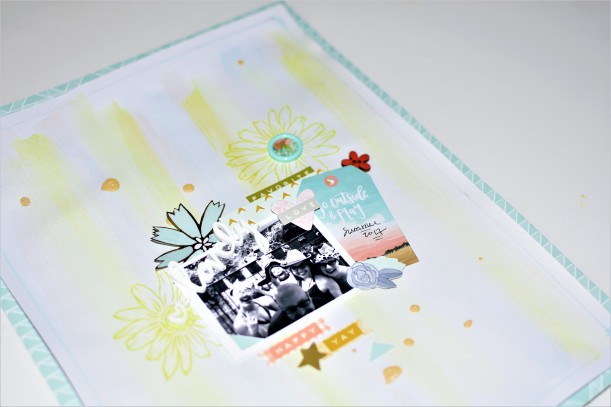
Hello friends! I have a fun mixed media layout to share with you today using some watercolor paints from Shimmerz Paints and stamps from Altenew. And of course, all of the other gorgeous papers and embellishments used are from the September Sundance kit. LOVE this kit. It’s so pretty and it’s perfect for scrapbooking those special outdoors events.

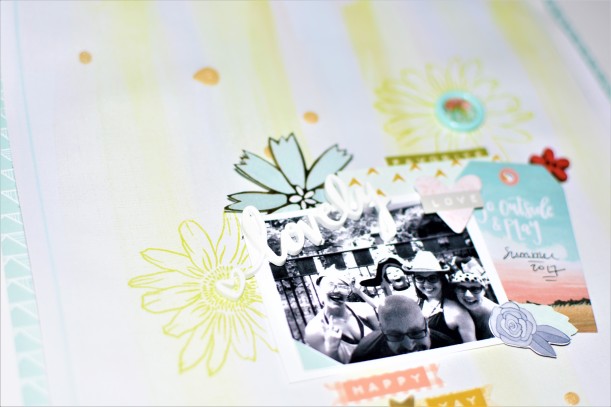
I used a some watercolor paints in the colors of beige, blue and green to draw different paint stroke lines down the page and across the page to create a fun background for my layout. While I was trying to figure out how to incorporate the tiny circle stickers on my layout, I found a button in my stash that was the perfect size for the sticker!

DSC_9000

I cut some flowers from the patterned paper to use as a die cut on my layout. I needed some flowers and that blue flower in the patterned is gorgeous!

DSC_9002

I splashed some gold paint onto the layout too. I love how much a touch of gold makes this layout pop. Such a fun, happy layout.

DSC_8997

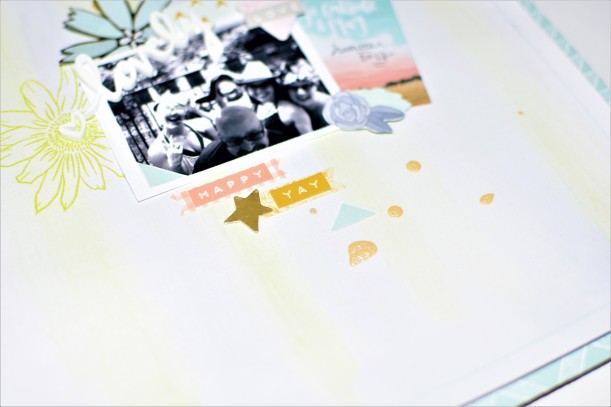
The tiny word stickers fit within the sticker banners perfectly! I always like using sticker banners with some kind of sentiment so I made these stickers work for me!

DSC_9007.JPG

Thanks so much for visiting today! I hope I’ve inspired you to try using watercolors and stamps on your layout. Don’t forget, the Clique Kits shop has a variety of mixed media products available. Click here to see what’s available.

Nicole


2 Comments

Art Studio: Summer Chillin’

Hello!
Donna here today with my second project using the August “Malibu” kit featuring Pink Paislee Summer Lights collection

ck-aug17-mainkit-sneaks2_orig

I also used this super cute exclusive cut file designed by Inna Moreva (July 2017 cut file – Sunshine) from the Digital Shop

s254461307115203172_p1860_i10_w640

and exclusive printables (Main kit and TN printables) you can find in the Digital Shop as well.

First off, here is a step-by-step tutorial how I created the layout:

  • You will need two cardstocks – 1 for the cut file and 1 for the base where you will adhere the cut file. Adhere the negative part of the cut file to the other cardstock, set the ‘good or positive’ cut file aside.

aug16---art-studio-tut1

  • Using a piece of plastic (any will do, just make sure it’s clean), spread watercolor (or any medium you prefer, diluted in water) to the surface. Start with one color first and build up the layers one after another.

aug16---art-studio-tut3

  • Add another color to the edges, spreading the diluted color with your fingers

aug16---art-studio-tut4

  • While the base is drying (or you can use a heat gun to help it dry faster), use different patterned papers as backing to the Sunshine cut file (I used a pencil to trace the floral parts of the cut file and cut manually with scissors).

aug16---art-studio-tut2

  • Once the base is dry, adhere the Sunshine cut file backed with patterned papers. Use foam tapes to add dimension to the cut file.

aug16---art-studio-tut5

  • Start embellishing

aug16---art-studio-tut6

And this is how my layout turned out

Donna-CKMalibu-Layout03

I added some fun details like this wavy flag and clusters of sequins and stickers.

Donna-CKMalibu-Layout03a1

Donna-CKMalibu-Layout03b1


Different heights added interest to the overall look of the whole page. Here, I used different thickness of foam tapes to adhere the photo and other embellishments like stickers and word arts.

Donna-CKMalibu-Layout03c1


The holographic embellishments are so pretty in person!

Donna-CKMalibu-Layout03fDonna-CKMalibu-Layout03d1


Donna-CKMalibu-Layout03e1

That’s all from me today but I will be back in a few days to share another project with you all.

Thanks for dropping by and happy crafting,

CK_DT17-headshots-Donna


3 Comments

Locker Room | THE OCEAN IS CALLING

CK- Locker Room - header

Hi Clique Kits fans!!

I am back today with a new project using the beautiful MALIBU TN kit,  what can I say, the Pink Paislee’s Summer Lights collection is gorgeous, and all the add ons are perfect to document summer, and those special beach adventures.

Malibu TN kit

I love this kit, and it is ideal to document some of the pictures from our beach adventures down in Ecuador.  Here is a small video on how this page came together, so sit down and enjoy!:

The starting point for this layout were the exclusive cut files from last year’s summer and August kits.  Once I had cut them on white cardstock, i wanted to add color to the page, something very summery and bright.

CK_NATHALIE DESOUSA_AUGUST2017_THE OCEAN IS CALLING

Using a combination of heavy acrylic paint, i dragged the paint across white cardstock, and soften the look of the streaks with a large brush, and a baby wipe.  Then stitched the page to one of the Elle’s Studio papers from last month’s POOL PARTY KIT.

CK_NATHALIE DESOUSA_AUGUST2017_THE OCEAN IS CALLING-4

The ring cut out also was sewn to the page, and then i used the Pink Paislee papers from the Malibu TN kit to back the flower cut out.  I love the rich colors in the papers, and how they contrast beautifully against the bright background.

CK_NATHALIE DESOUSA_AUGUST2017_THE OCEAN IS CALLING-5

The flowers were then attached to the background using a bit of foam adhesive.   I positioned them so that they were framed by the long leaves from the ring cut out.

CK_NATHALIE DESOUSA_AUGUST2017_THE OCEAN IS CALLING-6

I added the long leaves from the Fancy Pants  Hello Sunshine ephemera pack included in this month’s kit.   The title for this page comes from Pink Paislee’s Summer Lights ephemera pack -which can be found in the Malibu Main Kit -.

CK_NATHALIE DESOUSA_AUGUST2017_THE OCEAN IS CALLING-7

The picture of my daughter admiring the sunset over the Pacific Ocean fit into this page seamlessly.  A few of the embellishments from the kit, and the sticker sheet available at the Clique Store create the cluster on the page.  After a few sprinkles of gold ink, the page was completed:

CK_NATHALIE DESOUSA_AUGUST2017_THE OCEAN IS CALLING-3

I love this page, the colors of the papers in the Malibu TN kit matched the bright green color of the background, and bring the eye to the subject of the page.  It was so easy to complete the page using the  kit, and a few of the exclusive cut files available at the Digital Store.  There is a lot of goodies available at the store, so take some time to visit it to check them all out.

Remember to contact me, if you have a question about how this page came together.

See you all around!

CK_DT17-headshots-Nathalie


4 Comments

Art Studio- Mermaid Hair

Hi everyone!  Audrey here to share another page I made with my most favorite Clique Kits kit EVER!  The August Malibu kit featuring Pink Paislee Summer Lights!

I find it easier to work with a kit when there are also amazing cut files to go with them!  I used this “Scallop” cut file that goes along with the August monthly release.  You can find it in the store HERE.

This file reminded me of scales on a fish (or mermaid!) and with the other mermaid elements in the kit also, I felt I needed to do a mermaid page.  I found this photo of my daughter on the boat and I loved her messy hair blowing in the wind, her smile, and her purple life jacket that went perfectly with the colors in the kit.


I started by adding some mists and inks to the background.  I cut the file from the ombre blue/purple patterned paper and added it on top. I clustered a few embellies on each side of my photo after I matted it with some patterned papers


.

I added a few hints of scalloped stitching, and of course the mermaid chipboard on the bottom right.  To help your eye move across the page, I added a thin strip of polka dot paper on the left side of the page.

You can watch me create this page from start to finish here:


Thanks so much for watching and enjoy the August Kit!


2 Comments

Study Hall | VACATION


Hi there!

Nathalie here with you today.  I hope you all are doing well!

Here in Canada we are enjoying our Summer season, and that means travelling.  This year we headed back to my native Ecuador for a month long vacation, and brought back over 5000 pictures to live by until our next trip.  I was lucky to come back to find the gorgeous Malibu Traveler’s Notebook kit at my door step!  Right away,  the colors of the papers in the kit, and all the add ons were an open canvas to start documenting some of our vacation adventures.

Malibu TN kit


This month’s TN kit is loaded with many so many goodies that can easily also be reworked into a scrapbook layout.   Here is small video showcasing how the layout came together:


As you can see, the kits are versatile!.  In this case I used the Malibu TN kit to create this colorful, and vibrant page about our vacation resort.  It all started with the cut file (which i had previously designed), which you can easily download below -just click on the picture-.


CK_NATHALIE DESOUSA_AUGUST 2017_VACATION-3

Vacation -cut file

All the letter spaces were backed with the different 6×6 papers included in the Malibu TN kit, except the letter “o” which was backed with the subject’s picture.  After all the letters were secured, then i used some foam tape to add a bit of dimension to the page.

CK_NATHALIE DESOUSA_AUGUST 2017_VACATION


To add more color to the layout, I used some Prima’s The tropicals watercolor palette  to create a mixed media background.  The colors used match those of the papers in the Malibu kit.


CK_NATHALIE DESOUSA_AUGUST 2017_VACATION-2


To bring the eye to the picture of the layout, a few clusters were created around the “o”.   The clear stickers from the Pink Paislee’s Summer Lights can easily be backed with white cardstock, so that they stand out on the colorful papers.


CK_NATHALIE DESOUSA_AUGUST 2017_VACATION-6


To complete the visual triangle on this page, i used a combination of all the Malibu kit’s embellishments.   The exclusive printables (the escape sign) along with the fussy cut heart,  die cut pieces and the holographic star bring the page together.    Here is a look at the completed layout:


CK_NATHALIE DESOUSA_AUGUST 2017_VACATION-7


I am loving the final look of this page (even after a 6 week scrapbook free vacation)!  All the colors in the background complement those of the Malibu TN kit, and bring the picture to life.   Not to mention that those Neon pens included in the kit are so smooth, and they even work on top of mixed media!!!   If you haven’t checked the kit yet, then visit the Clique Kits Store to  see all that is included; there are still a few TN subscriptions available!!

Remember I am always a comment away if you have questions about how this page came together.  In addition, I would love to see what you create with the cut file, so don’t forget to tag me if you use it in one of your projects.

Til next time!


CK_DT17-headshots-Nathalie


1 Comment

Field Notes – Punches and Mixed Media

CK- Field Notes -traveler notes - headerHello, Clique fans! Enza here today to share a new Traveler’s Notebook spread. Look at all the fabulous goodies in the July Pool Party Travelers Notebook kit!

ck-jun17-tnkit2_4_orig

I went back to my good ol’ punches again. This is a floral border one from Martha Stewart that I have had in my stash for quite a while. The idea was to create a colorful background using different patterned paper from the Ain’t Life Grand collection featured in the kit.

egudor_July2nd_FieldNotes

egudor_July2nd_FieldNotes_CloseUp1

On the opposite side of the page, I used a mixed media paper from Kaisercraft that came in the May Sorbet kit. After cutting it to fit, I simply colored it with a mini ink blending tool and shades of ink that matched the colors in the papers. One of the sentiments from the collection served as my title, which was placed in the center of the page and backed with some thread for added texture.

egudor_July2nd_FieldNotes_CloseUp5

I layered the photo with a mix of patterned papers. The journaling, as well as some sentiments, were typed and then cut into strips.

egudor_July2nd_FieldNotes_CloseUp2

egudor_July2nd_FieldNotes_CloseUp4

egudor_July2nd_FieldNotes_CloseUp3

Thank you for stopping by today! I hope you felt inspired to use the July Pool Party Travelers Notebook Kit on your pages and maybe give your punches a try 😉

Have a lovely day!

Enza


2 Comments

Art Studio: Happy Moments

Hello scrappers. I’ve been anxiously waiting to share this layout with you.  When I started creating this layout, I had no idea what I was going to do. The one thing I was sure of, is that I wanted to use lots of patterned paper. The papers in this months’ kit are so pretty. Wouldn’t you agree. It’s hard not to use them all. LOL I even cut the branding strips from the papers and used them as a fun border for my layout on the left-side of the layout.

I’ve had an acrylic frame in my stash for some time now and after watching Finnabair share the new Metallique Paints, I was inspired to use some of the Metallique paints from my stash. I painted the frame using the Deep Waters and Blue-Gold paints. SOOOOO Pretty! I love how vibrant these paints are.

I fussy cut the flowers from the floral paper and added buttons and jewels from my stash to the center of the flowers to add more texture to the flowers. I used foam squares to adhere them to the layout.

Here is a closer look at the branding strips used on this layout.

I fussy cut the butterfly from one of the patterned papers to use as a die cut for the bottom right-side of my layout.

Thank you for visiting today!


3 Comments

Geek Lab- Clique Cuts


Have you checked out all the amazing cut files available in the Clique Kits store?  You can see them all HERE.

I saw these cute little butterflies, which were a subscriber exclusive, and I thought they would match well with the June kit, Aquarelle. This kit features Cocoa Vanilla Studio “Wild at Heart” collection, which also has quite a few butterflies.

I started by adding some mixed media to my background and using a stencil to spray some ink through a starburst pattern.  Then I outlined the starburst in yellow thread.

I cut the butterflies from white cardstock and then fussy cut a whole bunch of smaller butterflies from the patterned papers in the kit.  I decided not to back the die cut butterflies with paper so that the background could stand out more.

I layered a few labels for my journaling with a  large heart and  piece of exclusive flair.


I love that these products matched my photo and story so perfectly!  Hope you are enjoying the June it and be sure to check out the cut files in the store!


3 Comments

Yearbook: Celebrating Mother’s…

When I first saw the June kit, Aquarelle, I fell in love with the mix of florals and geometric prints!   The colors also reminded me so much of my mother, and I had the perfect photo in mind from last mother’s day.  Somehow, on Mother’s Day last year, my mom and I ended up making everyone else brunch….we stopped and looked at each other and said, “Wait, why are we doing this?”.  I guess it’s just what mom’s do!


I started with the pinkish watercolor background paper and added some gesso and mists.  Then I layered small squares of patterned papers, 3×4 cards, and vellum from the kit in a loose circle arrangement and stitched a circle with teal thread.


Next I cut one of the exclusive cut files for this months kit from white cardstock and layered it over the circle.

A few more scattered bits from the die cuts/ephemera pack and a title with the Pinkfresh copper colored alphas to finish the page.

Thanks so much for stopping by today!


4 Comments

Favorite – Guest Contributor Kareen Dion

Well hello again!
It’s me!!! Kareen. I’m back with another layout. Yeah!
I, of course, used the Sorbet May kit? Did you fall in love with it?
Not yet? Well, what are you waiting for!

ck-may17-kit-1_1_orig

So, here is my layout!
For the background, I used the Kaisercraft paper from the kit.
It was perfect for watercolor and for a resist effect. cliquekits

Some close ups :
As you can see, I used a lot of embellishments from the kit. I only add flowers. cliquekits_2

I also used a 3″x 4″ card from the 12″x12″ Kaisercraft paper.
I watercolored it the same color of my background.cliquekits_3

I also used the printables that goes with the kit. A good way to embellish your layout!cliquekits_4

And a little extra today…. I made a video!

Thanks for stopping by and see you next time!

CK_GC17-headshots-Kareen