Clique Kits

Click. Connect. Create.


Leave a comment

Geek Lab: Adventure Card

Hi friends,

Melissa here with you today and it’s a bittersweet post! This is my last one… not just for this current kit but also for my term as a design team member. I have absolutely loved my time here with Clique Kits but, I had to make the decision. I love designing and teaching and empowering other creative types but, it’s time to take a break from DT’s and focus on me and what I want to do. I’m looking forward to no deadlines and such. But, I will say, this team will be one I will miss. I hope you know that Clique Kits has a GREAT things here. Beautiful kits (will always be my favorite), amazing inspiration (I’m excited to see what the next team does) and a fun community (have you joined us on Facebook yet?)

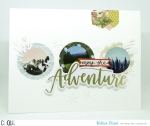
For my last card with you all, I wanted to, once again, show you a card using the gorgeous cut files that are exclusive to the CK kits. I loved the fall leaves square but, was more drawn to the individual leaves. In my head, I pictured utilizing the circle stickers and then embellishing with the leaves. It turned out better than I even thought. I hope you like it too. Here is the finished card a few close ups:
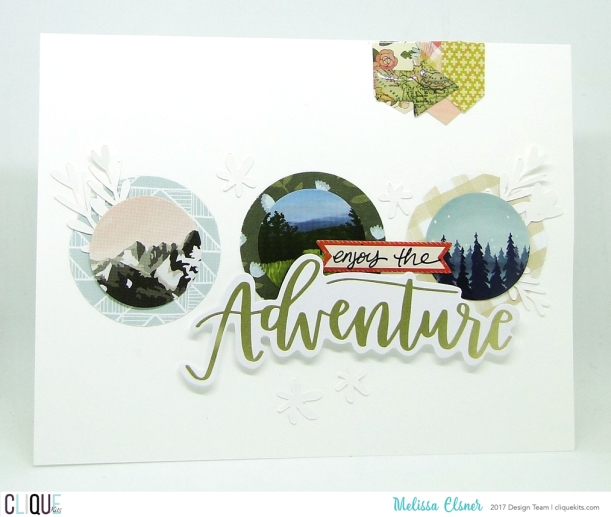
melissae_cksept17_adventure1

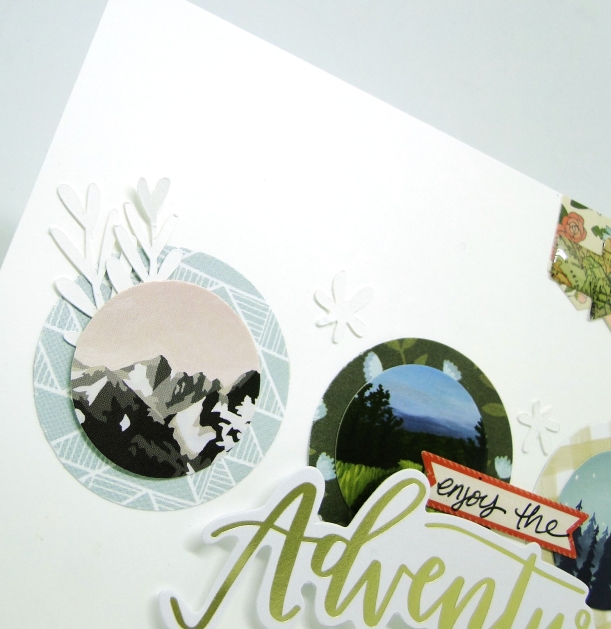
I also used the little asterisk shaped cut files that were part of that square. I actually like the texture they bring with the tone on tone of the white cardstock. I was equally excited when I realized you can see them in the photo too!
melissae_cksept17_adventure2

How cute do those leaves look??? They really add the perfect amount of texture and help the card have a bit of interest. Those stickers are fabulous but, when in a pinch for that “one more thing”, cut files are the best!

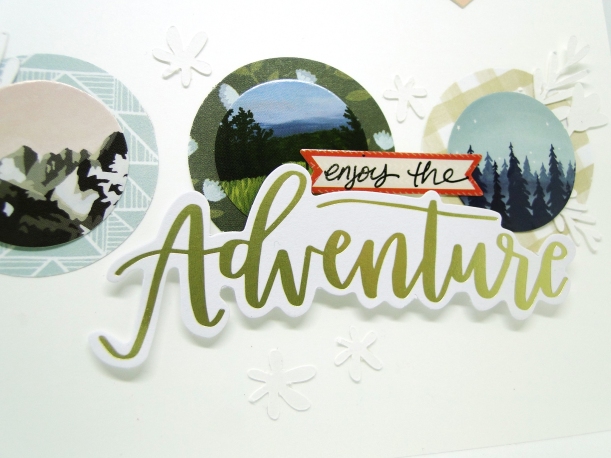
I decided to hand write the first part of the sentiment on to one of the stickers. I just could not find the right alpha in my stash or anywhere else so, handwriting it is. Thankfully, I do like my handwriting!
melissae_cksept17_adventure3

Thanks for joining me here today!

The past year has definitely been an adventure I have enjoyed and I’m also looking forward to moving on! See you around!

ck_dt17-headshots-melissa


4 Comments

Locker Room: Enjoy the Journey Card

Hi friends,

Melissa here with you again and I’m sharing the second, of four, projects I have made using the stunning September Sundance kit.

I love Locker Room posts! The title always reminds me of half time at a football game (totally appropriate right now since it’s football season GO HAWKS!) and the coach is getting every one fired up again… whether it’s because the team needs a kick in the toosh or maybe they are rocking it out and don’t want to lose steam. So… this type of post always has me wanting to give you a pep talk! Maybe you have no mojo… maybe you are going strong… whatever it is, I hope that I can just provide with a couple more tools for your creative toolbox and how to make the most of your kit!

Here we go!

20170812_192448

I know, I know. This looks like the makings of an Art Studio post but, it’s not. This piece of cardstock was a booboo. I messed up with my ink for another project. Almost threw it out but, noticed the colors went perfect with the papers in this kit. So, I added a few more splatters and decided to use it as my cardstock base. See? Even our “mess ups” end up useful! Don’t throw them out just yet!

20170812_220537

Alright, so this next part has a lot to share. One of the ways I love taking on a new perspective and/or stretching my product is to look at what I can fussy cut. The flowers and leaves were so perfect to do this with! It definitely helps to utilize every single part of the kit. I also wanted to incorporate one of the cut files. I love how cut files can add more to the projects and, the best part? You never run out! I’m also going to be using some of the stickers on this card and those fun alpha stickers.

20170812_220858

I want to point out something with this card, so far. When I use mists and inks on my cardbase, I notice that I use less product. Why? Because the inks provide a couple of things… texture and color. That way, I can bring in a little pop of something with the pattern papers and embellishments but, not too much. The result is my product/kit lasts longer! And I can make more! Which is exciting when I love the collection and papers and all that! Yay!

Here is the final card with the finished sentiment and embellishments…

20170812_221134


melissae_cksept17_journey1

Thanks for swinging by today! Head over to the shop to see more of the September Sundance kit, as well as, the ala carte shop for all the beautiful add-ons you can get! Use code melissa10 at checkout and save 10% on your order!

Until next time…

ck_dt17-headshots-melissa


3 Comments

Geek Lab: Dream Big Card

CK - Geek Lab - header

Hey friends,

Melissa here with you today and I’m sharing one of my four projects created using the absolutely stunning September Sundance kit. Seriously, it is so beautiful. I just love the two collections from 1 Canoe 2 and Fancy Pants. So Fall but, a slightly different color palette than the usual oranges and browns. Love!

Alright, so, on to my project. Today I wanted to share with you a fun card using one of the cut files from the CK Store. I love using cut files and I know there are so many posts and tutorials on using them but, it never hurts to see one more. Right? Plus, it also doesn’t hurt to remind you we have some awesome cut files here in the shop! Designed exclusively for you by some top notch ladies, too, and they go so well with the kits and product! Yay!

Alright, here is the cut file already cut out and ready to go…

20170812_223134

To get my papers ready, I kept the “negative” pieces of the cut file and used them as a template. That way, I knew I would get slightly bigger to the true size. This helps immensely when getting ready to place them in between those spaces of white cardstock. I know they fit and will go over slightly so I can use some adhesive too. I found it easier to adhere the patterned paper strips to the card first. Especially for this particular cut file since there were some super thin pieces. It’s hard to line it up right and get it down perfect.

20170812_223326

Because of the thin lines of cardstock, I used glossy accents as my liquid adhesive. It dries clear and I don’t mind the slight shiny parts that show. After adhering the cut file on to the cardstock, I didn’t like how the basket part of the hot air balloon looked as just white. It was too late, and too annoying, to try to cut out from cardstock something so, I dug out my Gelatos. Next time… I will remember to cut out “just in case” OR color with the ink FIRST. It got a little sketchy a few times and almost smeared on my card base. But, in the end, I don’t mind the way it looks.

20170812_223815

The puffy sticker words from Fancy Pants are just perfect for cards! Almost all of the sentiments are PERFECT and I thought this one would go so well with the hot air balloon.

melissae_cksept17_dreambig1

The card really didn’t need much else! Just a of the die cuts from the kit and ta da! Easy and so fun and whimsical.

Thanks for joining me today for Geek Lab! I hope you get a chance to grab some of the awesome cut files in our shop and use them to help stretch your kit! Make sure to use code melissa10 at check out to save 10% on your order!

Until next time…

ck_dt17-headshots-melissa


4 Comments

Art Studio- Mermaid Hair

Hi everyone!  Audrey here to share another page I made with my most favorite Clique Kits kit EVER!  The August Malibu kit featuring Pink Paislee Summer Lights!

I find it easier to work with a kit when there are also amazing cut files to go with them!  I used this “Scallop” cut file that goes along with the August monthly release.  You can find it in the store HERE.

This file reminded me of scales on a fish (or mermaid!) and with the other mermaid elements in the kit also, I felt I needed to do a mermaid page.  I found this photo of my daughter on the boat and I loved her messy hair blowing in the wind, her smile, and her purple life jacket that went perfectly with the colors in the kit.


I started by adding some mists and inks to the background.  I cut the file from the ombre blue/purple patterned paper and added it on top. I clustered a few embellies on each side of my photo after I matted it with some patterned papers


.

I added a few hints of scalloped stitching, and of course the mermaid chipboard on the bottom right.  To help your eye move across the page, I added a thin strip of polka dot paper on the left side of the page.

You can watch me create this page from start to finish here:


Thanks so much for watching and enjoy the August Kit!


3 Comments

Geek Lab- The Ocean is Calling


Hi everyone!  I have totally ripped through this entire August Kit, Malibu, featuring Pink Paislee Summer Lights collection.  I love the water color look and the gradations from yellow to blue to purple and pink.

For Geek Lab today, I thought I would use some of my trusty tools: my Silhouette Cameo, my sewing machine and a circle punch.

I began by cutting this cut file from the store from a CK Clique Into Color Kit from a year or so ago.  The images are large paint strokes, and I wanted to create a “sand” layer, a “water” layer, and a “sky” layer up my page.  Once I had my layers down, I stitched over most of them with coordinating threads to add some texture and interest.

Once I had the layers on, I punch some circles from coordinating papers and overlapped them on two colors.  I wanted a place to ground my embellishment and the circles did just that.

Finally, I embellished each circle area with chipboard and stickers.

You can watch the whole process here:


What are your favorite tools to use on a page?

Thanks so much for stopping by today!

-Audrey


2 Comments

Locker Room – Mini Album

CK- Locker Room - header
Hello everyone! Enza here with a mini album to share with you today using the beautiful July Pool Party Travelers Notebook kit.

ck-jun17-tnkit2_4_orig

egudor_July17_LockerRoom_Full
The idea for my mini was to have a 2017 album with only one picture per month. I do this a lot. I use the same concept for my TN. I think it’s fun to look at random pictures and get a feel of how our life is/was during that given year. You will also notice there is no journaling. The reason for it is that I usually include the full stories in our Project Life albums. Sometimes I just want to look at pictures and pretty papers 🙂
egudor_July17_LockerRoom_Cover
The 4×6 cards from the Ain’t Life Grand collection included in the kit are just the right size. I started by cutting a few tag shapes from different patterned papers and adhered them back to back. I love how thick the papers are. There is no need to add extra cardstock in between the layers to make your pages stronger, which saves time and money 😉 Once all my pages were ready, I embellished them with a variety of elements. A mix of ephemera pieces, exclusive cut files and printables from the Clique store, and some stitching added that layered, unique look I love.

Here is the front:

egudor_July17_LockerRoom_Front

Here is the back:
egudor_July17_LockerRoom_Back
The alpha stickers I used were included in the June Aquarelle kit. The copper color coordinates perfectly with the Pool Party TN kit.
egudor_July17_LockerRoom_CloseUp6
Some of the cut files were modified to fit the tag shape. Same idea was used for a couple of pictures, as well as the 3×4 cards that come in the kit. I just adhered them back to back, cut the top corners, and punched a hole to fit the other tags.
egudor_July17_LockerRoom_CloseUp3

egudor_July17_LockerRoom_CloseUp5

egudor_July17_LockerRoom_CloseUp1
egudor_July17_LockerRoom_CloseUp2
I hope you enjoyed reading about my process and will maybe use your Traveler’s Notebook kit to make a fun and colorful mini album.

Until next time. Have a lovely day!

Enza


1 Comment

Clique Kits July Challenge

Hello Clique Fans!  Erica here with you to bring you our July challenge!  First thank you to everyone who added projects in our Clique Facebook group for the June challenge!  The randomly selected winner for June is Denis Montecinos!  Please email erica@cliquekits.com to claim your prize!  We hope to see you again this month for our July challenge!

This month our challenge is ANYTHING GOES so have fun and lets so those projects everyone!  I know a lot of you are scrapping your summer memories so add them to the July challenge album in the Clique Facebook group for a chance to win a gift certificate to the Clique Kits shop!

Here is a look at some inspiration from a few of our design team members using the July 2017 kits!

HANNAH

NATHALIE

EVI

Remember you can link up in The Clique Facebook Group HERE!

Here are a few details about the challenge!

  • You may combine our challenge with other challenges
  • You may enter our challenge up to 3 times
  • Link up your projects by August 3rd, 11:55 pm CST
  • You are not required to use a Clique Kit to link up.
  • Create any type of project

Thank so much for stopping by today!


3 Comments

Geek Lab- Clique Cuts


Have you checked out all the amazing cut files available in the Clique Kits store?  You can see them all HERE.

I saw these cute little butterflies, which were a subscriber exclusive, and I thought they would match well with the June kit, Aquarelle. This kit features Cocoa Vanilla Studio “Wild at Heart” collection, which also has quite a few butterflies.

I started by adding some mixed media to my background and using a stencil to spray some ink through a starburst pattern.  Then I outlined the starburst in yellow thread.

I cut the butterflies from white cardstock and then fussy cut a whole bunch of smaller butterflies from the patterned papers in the kit.  I decided not to back the die cut butterflies with paper so that the background could stand out more.

I layered a few labels for my journaling with a  large heart and  piece of exclusive flair.


I love that these products matched my photo and story so perfectly!  Hope you are enjoying the June it and be sure to check out the cut files in the store!


2 Comments

Field Notes | Cutfile Cards

field-notes

Hey everyone! I want to share some cards with you today that I actually made a bit ago using an incredible cut file that was free to download with the May Challenge – you can find it here.

IMG_4162-imp

So I actually downsized the cut file a bit so it would fit better on my cards and cut about 3 or 4 different pattern papers from it using the June Kit.

IMG_4163-imp

For this card I adhered the little triangles closely together onto a piece of cardstock and then trimmed it down and used it as it’s own layer when putting my card together.

IMG_4167-imp

And for this card I actually followed the exact format of the cut file and adhered each triangle directly onto my card base in specific places. I love how different both of the card designs ended up! 🙂

Thank you so much for stopping by and I hope you have a fantastic weekend! 😉

Xo, Stephanie

Follow me: MY BLOG // FACEBOOK // INSTAGRAM // PINTEREST


3 Comments

Locker Room – Delightful Magnolia Tree

blog-image_locker-room1

Hello! Here is Réka and today I’m sharing with you how I use the cut file as the stitching pattern. For this 8.5 X 11” layout I’ve chosen one illustration from the May Kit excusive cut files which designed by Maryám. I really love these cute houses and these fit my photo perfectly.

ck-may17-cuts-web_2_orig

Firstly I’ve printed the house background, then punched the paper and finally sewed it with white thread.

2

My first thought was to stitch the whole paper but in the end I’ve decided to embroider only around and some places where I knew that the photo did not cover the paper. With this I’ve saved a little time. Two hearts were stitched with pink thread because pink is one of the main color of my layout beside blue and grey.

After I’ve finished the sewing I’ve splashed a little with pink paint.

3

Decorating was coming! The photo has been glued to the cardstock with 3D glue. I ’ve added two strips on the top and on the botton part of my layout. The pink one was painted with watercolor and the other one was cut from the Pinkfresh Studio Fancy paper. I’ve sewed them with my sewing machine on the paper. After I ’ve made two clusters for the photo’s left and right corner which I’ve used the beautiful embellishments from May Main Kit. When I saw the Delightful label in the kit I knew I would use it for my Magnolia Tree’s photo. On my page I’ve also used the cute bird because we wake up to bird-songl. The Magnolia Tree and data labels were edited in the Microsotf word and then printed. Let’s see the page.

1-1.jpg

Here are some close-ups.

4

5

6

The stitching is a very good solution when you haven’t got the cutting machinee but you really like using the cut files on your page. Beside the stitching is always so interesting because you will see the result only you finished it.

Hopefully, I managed to inspire you to stitching on your page. Thanks for stopping by and have a wonderful crafty day!

See you next time. Réka

CK_DT17-headshots-Reka (1)