Clique Kits

Click. Connect. Create.


Leave a comment

August Clique Kits Pep Rally

pr-image


Welcome! Please join us today for the August Instagram share. We hope to inspired you with a variety of projects using the August Malibu kit. Here’s how this works; it’s very simple.

Subscribers are eligible to earn free product credits for participating in the Pep Rally via Instagram. Participation is a very relaxed commitment on a month by month basis. Simply email marketing@cliquekits.com by the 15th of the month to have your credits recorded. Subscribers may earn 5 credits (1 credit=$1) for each month they participate. If you end up not participating- we lash you with wet noodles. (Kidding.) We simply skip over your points that month. Credits are cumulative as long as you are still a subscriber! Sound good so far?

What do you do once you sign up? This is really straightforward too. We hope this step by step instruction covers what you do, who is eligible to win a prize, and what the prizes are.

Step 1: Take pictures of projects you created using the monthly kit (please use a minimum of 80% kit and add on products so that the inspiration provided for the Clique is kit-focused.) You can do this anytime during the month- but be sure your photos post before 10 am CST on Pep Rally Day.

Step 2: On or before Pep Rally day, join the event on Facebook and Instagram by sharing on Facebook with your friends and tagging them on Instagram letting them know that each name tagged is entered to win a gift certificate to spend in the CK shop!

Step 3: Use the Instagram search tool with the keywords specified in the Hashtags and enjoy the eye candy! Leave some love for all your friends!

Step 4: Tune in to Clique Kits for announcements of the monthly Pep Rally participant winner selected to win an additional $10 product credit to spend in the Clique Kits store!

And without further ado, here are the hashtags. The first 3 are the same every month. The last two will obviously change each month.

#Click_Connect_Create

#CKPepRally

#CliqueKits

#CKAugustKit

#CKMalibu

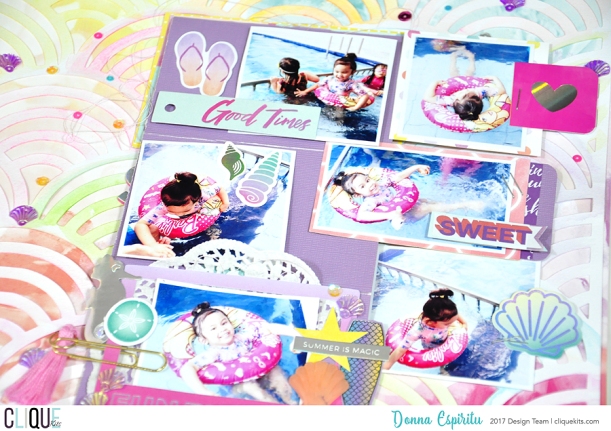
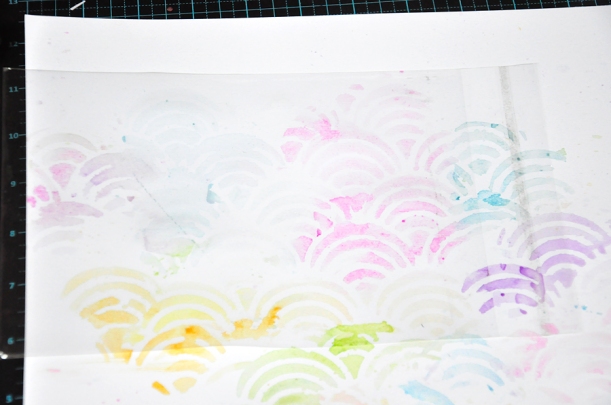
Here is a sneak peek at some of the projects that our Design Team has created for the hop!

And before you run off to check out the beautiful projects by our Varsity Team and Subscribers, here is the September Kit!

20748016_707964989388339_8955602762503223274_o

CK_Sep17_MainKit-28.jpg

CK_Sep17_MainKit-26


Now get out there and get inspired because there are tons more where these came from! We love our subs and followers, and our community is growing every day. We are so thankful for you and hope you have fun!


1 Comment

Yearbook: Summer Fun

Hi! It’s Donna here sharing another layout using the August “Malibu” kit, exclusive cut files and printables.

20121311_10209396396442132_5681943947058556093_o

20106836_698221963695975_3812447161498738528_n

I always get stumped when it comes to scrapbooking multiple photos in a layout. How do I make it work without making it too crowded? How can I make the design interesting?

Then an idea occurred to me while staring at this.

DSC_7371

Create a folding mini-album! It’s not a unique idea and has been used several times but it’s fun so why not do it once in a while.


I used a piece of 12×12 cardstock and folded 4 times. The width and height depend on the sizes of your photos. I adhered in place the last fold/panel.

Donna-CKMalibu-lAYOUT041a

Donna-CKMalibu-lAYOUT042

Donna-CKMalibu-lAYOUT043

I used foam tapes to create a space so I can insert another photo underneath.

Donna-CKMalibu-lAYOUT046

Fun and interesting way to add multiple photos in a single spread.

Donna-CKMalibu-lAYOUT047

Donna-CKMalibu-lAYOUT045

I also made this tassel so the mini-album will stay folded.

Donna-CKMalibu-lAYOUT044

That’s all from me today! I hope you like my project as much as I do! ❤

Thanks for dropping by and happy crafting,

CK_DT17-headshots-Donna


1 Comment

Locker Room: How to make a Shaker Card

Hello, Friends! Maryám here to share my last project using the beautiful Malibu 2017 kit. I still have a lot pieces from the kit, so I’m going to continue making more layouts with my kit. For today’s project, I’m going to show you how to make a shaker card.

I love shaker cards, and when I saw the beautiful sequin mix that came with the kit, I knew it would be the perfect opportunity to do it.

Here is the card I made:

Here are some close-ups of the card: Don’t you think the sequins look perfect?


Here is the process video of my card. So, if you want to learn how to make a shaker card, please watch the video:


I hope you liked my project. If you have any question, please put them down below.

Have a wonderful day!

Maryám.


2 Comments

Field Notes: Summer Vibes

Hey, dear friends! So happy to be back with you today. For today’s project, I’m going to be using my traveler’s notebook + my main kit, but you can also use the Traveler’s Notebook kit of this month.

I created two-page spread project. On the left side, I put the photo, the journaling, and some really cute embellishments from the ephemera pack. I also added some sequins from the exclusive mix and a few holographic stars.

On the right side, I covered the page with the pattern paper N° 3 and on the bottom part, I added a label from the printables of this month + a holographic sun.

Here are a few close-ups:

I hope you liked this project, and don’t forget to follow us on social media to be the first in seeing the new stuff coming up to our shop. See you tomorrow.


1 Comment

Yearbook | MY SUMMER JOURNAL

Hello everyone!

I am back today with my final post using the beautiful and super colorful MALIBU TN kit.  If you haven’t checked the kit completely, then just click here -to be taken to the Clique Kits website-, and you could see the entire kit and add ons.

Malibu TN kit

I have kept a journal/diary since i was a small kid.  Through the years the format has changed, but I fell in love with TNs a few years back, and used them as my form of memory keeping/Project Life.   So I thought, I will share with you how i have incorporated the Malibu TN kit to some of my daily TN entries.

CK_NATHALIE DESOUSA_AUGUST2017_MY PERSONAL JOURNAL-3

We are babysitting my littles for the summer, so I had to snap a picture of the kids and my daughter as they enjoy some summer movie fun.   I converted it to b/w so that it can easily fit into the spread without clashing with the colors in the papers.  Next, I cut one of the papers from the Pink Paislee’s Summer Lights collection to about a 1/2in taller than the picture.  I cut the paper so that it could easily fit into the 2 pages of the spread, and then added my picture at the end of the paper.

CK_NATHALIE DESOUSA_AUGUST2017_MY PERSONAL JOURNAL-4

To balance the page, I cut some of the leftover pieces from the papers in the MALIBU kit (i am down to scraps of papers after all this projects!), and created banners. They all were attached to the top of the page, above the picture, in a cluster with a little piece of washi tape from my stash.

CK_NATHALIE DESOUSA_AUGUST2017_MY PERSONAL JOURNAL-2

The typed journal lines balanced the spread, and a few embellishments made from the  papers, stickers, and exclusive printables from this month’s Malibu kit complete this page.  So simple and quick to put together.

CK_NATHALIE DESOUSA_AUGUST2017_MY PERSONAL JOURNAL-5

Next,  i used this striped paper from the Summer Lights collection (featured in this month’s Malibu TN kit) as it reminded me of a beach towel.

CK_NATHALIE DESOUSA_AUGUST2017_MY PERSONAL JOURNAL-7

This time, I used the entire 6×6 paper sheet to cover the center of the 2 page TN spread. I cut the paper so that it fit on both pages, and glued a picture of the 2 girls to the top corner of the paper.  I added a small piece of another paper to mat the picture, and make sure it pops from the busy background. a few fussy cut images from the CK Exclusive printables, and the papers  along with the swim suit chipboard sticker is all that was needed to  frame the picture.

CK_NATHALIE DESOUSA_AUGUST2017_MY PERSONAL JOURNAL-8

I used my editing software to enlarge some of this month’s exclusive printables.   In this particular page, I chose to add my sentiment inside the hexagon.  I am loving the alphas from last month’s POOL PARTY kit.  The color matched this month’s kit also.

CK_NATHALIE DESOUSA_AUGUST2017_MY PERSONAL JOURNAL-6

Here is the final layout.   I love how easy it came together, and all the color in the page -even in the journal lines… the neon pens included in the kit will steal your heart, too!  I hope you all are ready to use the MALIBU KITS to document your summer adventures.  There are a few available at the Clique Store, so make sure you can get your hands on one of them… You will love it!

Remember to leave me a comment if you have questions on how this came together, or just to say hi!

Take care!

CK_DT17-headshots-Nathalie


2 Comments

Art Studio: Summer Chillin’

Hello!
Donna here today with my second project using the August “Malibu” kit featuring Pink Paislee Summer Lights collection

ck-aug17-mainkit-sneaks2_orig

I also used this super cute exclusive cut file designed by Inna Moreva (July 2017 cut file – Sunshine) from the Digital Shop

s254461307115203172_p1860_i10_w640

and exclusive printables (Main kit and TN printables) you can find in the Digital Shop as well.

First off, here is a step-by-step tutorial how I created the layout:

  • You will need two cardstocks – 1 for the cut file and 1 for the base where you will adhere the cut file. Adhere the negative part of the cut file to the other cardstock, set the ‘good or positive’ cut file aside.

aug16---art-studio-tut1

  • Using a piece of plastic (any will do, just make sure it’s clean), spread watercolor (or any medium you prefer, diluted in water) to the surface. Start with one color first and build up the layers one after another.

aug16---art-studio-tut3

  • Add another color to the edges, spreading the diluted color with your fingers

aug16---art-studio-tut4

  • While the base is drying (or you can use a heat gun to help it dry faster), use different patterned papers as backing to the Sunshine cut file (I used a pencil to trace the floral parts of the cut file and cut manually with scissors).

aug16---art-studio-tut2

  • Once the base is dry, adhere the Sunshine cut file backed with patterned papers. Use foam tapes to add dimension to the cut file.

aug16---art-studio-tut5

  • Start embellishing

aug16---art-studio-tut6

And this is how my layout turned out

Donna-CKMalibu-Layout03

I added some fun details like this wavy flag and clusters of sequins and stickers.

Donna-CKMalibu-Layout03a1

Donna-CKMalibu-Layout03b1


Different heights added interest to the overall look of the whole page. Here, I used different thickness of foam tapes to adhere the photo and other embellishments like stickers and word arts.

Donna-CKMalibu-Layout03c1


The holographic embellishments are so pretty in person!

Donna-CKMalibu-Layout03fDonna-CKMalibu-Layout03d1


Donna-CKMalibu-Layout03e1

That’s all from me today but I will be back in a few days to share another project with you all.

Thanks for dropping by and happy crafting,

CK_DT17-headshots-Donna


4 Comments

Locker Room: Summer 17′

Hello, friends! Maryám here again to share another layout made using the Malibu kit 2017. For the main element of my layout, I used an old cut file from CK and I cut it on the paper N°8 with my Silhouette Cameo, and then I added some hand-stitching to it.

Here is the result: What I’ve done basically was add a bunch of embellishments around the wreath, then put my photo, the journaling and at the end add some watercolor splatters. You will see the haul of the process in the video at the end of the post.

Here are some close-ups:

Here is the process video. If you have any questions just let me know.

Thanks for stopping by today.

Have a wonderful day!


3 Comments

Geek Lab: Yes is more

Hello CK friends! Today I’m going to share a layout using the beautiful Agust 2017 Malibu kit. This month we have a lot of digital exclusives, and of course, I had to use them!

Here is my layout: I used the beautiful scallop cut file as my background and I backed it with the paper N° 10. After that, I put my photo, I created two clusters of embellishments around my photo, adhered my title and the journaling and at the end, I added some splatters and some sequins.

Here are some close-ups:

I hope you liked my layout. If you have any questions about my page, just let me know in the comments below.

Have a wonderful day!


3 Comments

Give me Sugar! Layout by guest designer Rachel Lowe:


Hello everyone well this is my last share as a guest designer for Clique Kits and it has been such fun!

I have loved working with the stunning Malibu Kit!

IMG_5903.PNG

And here is my layout titled Give me Sugar! for obvious reasons!

I just adored the CK August exclusive ice cream cut file and just couldn’t resist using it.

I used the ombre striped paper from the main kit papers for the ice cream cut file and then used the sequin mix to finish them off.

IMG_5961

I loved the puffy stickers and I have used the quote puffy sticker in keeping with my theme….give me sugar!

I have foamed mounted my photo so I could tuck embellishments under it like the ice cream and popsicle die cuts. The hexagons are from the sticker sheet.

I added the emoji face die cuts, because who isn’t happy eating ice cream!

I have finished my layout off with sewing a border around my page and adding the cut file word Sweet (in white to keep my page soft).

Here are some close up photos for you:

IMG_5981

IMG_5980

IMG_5985

I love scrapping ‘no people’ photos like this, it is important to remember such things as favourite foods, seasons, books etc as they are a sum of us!

Thank you so much for stopping by this month to check out my layouts and I hope they have inspired you in some way!


4 Comments

Geek Lab: Mermaid (in the bath tub)

Hello! Donna here for my first layout using the August “Malibu” kit featuring Summer Lights by Pink Paislee

ck-aug17-mainkit-1_1_orig

I used the August cut file “Scallop” as a stencil. Instead of paper, I used an acetate (A4) and run it through my Silhouette Cameo machine (I selected “Stencil Material” in the material type option). This will ensure I can use the stencil over and over again! How cool is that?? Cutting just took a bit longer than usual but it’s worth it.

Donna-CKMalibu-Layout02-tut1

1. Figure out where you want the photo. Then place the scallop stencil on the white cardstock and brush watercolor randomly.

Donna-CKMalibu-Layout02-tut2

2. Use a piece of plastic to spread the watercolor while it’s still wet.

Donna-CKMalibu-Layout02-tut3

3. Flicker the brush to create splatters. The farther the brush, the bigger the splatter will be. Let it “sit” for a few minutes.Donna-CKMalibu-Layout02-tut4

4. Then, use a tissue to blot off the excess water. Your background is ready to be used! I love how the scallops look like rainbow waves.

Donna-CKMalibu-Layout02-tut5

This is my finished layout

Donna-CKMalibu-Layout02

I cut out the ombre pink hearts and scattered them all over the page. I mounted some with foam tape for dimension.

Donna-CKMalibu-Layout02a

I mounted the framed photo with foam tape as well and tucked some messy thread and sequins under it.

Donna-CKMalibu-Layout02cDonna-CKMalibu-Layout02d

Some more close up images

Donna-CKMalibu-Layout02bDonna-CKMalibu-Layout02e

Would love to hear what you think of my project today! Just leave a comment if you have any questions and will happily answer them as much as I can.

Thanks for dropping by!

Happy crafting,

CK_DT17-headshots-Donna