Clique Kits

Click. Connect. Create.


2 Comments

Locker Room-Adventure Mini Album

CK- Locker Room - header

Hello friends! Welcome back to the Clique Kits blog!  Today I am sharing a fun adventure mini album using the September main kit. Like I said in my last post I am just over the moon for this kit!  I love all the dark blues and greens, and woodgrain paper always has my heart. You can pick up the kit in the shop here you can also take a look at all the September shop update here.


20748016_707964989388339_8955602762503223274_o

I love putting little mini albums together and this kit is just perfect for all our family outdoor adventures.

To start the album I adhered the ‘Take a Hike’ die cut to the center of a 4×4 acetate sheet so you could see the beautiful map paper through it.

TakeAHike-1

On the opposite side of the die cut I adhered a wood circle from my stash and added another die cut heart.

TakeAHike-2

When the first page is turned I placed one of the 4×6 journal cards cut down to 3.5×3.5 to the left side of the page and paired it with a die cut and a photo of one of my boys on an adventure hike.

TakeAHike-3

I repeated the process on the next page but switched the orientation. I also adhered the journal card this time on vellum to add a little bit more interest and texture.

TakeAHike-4

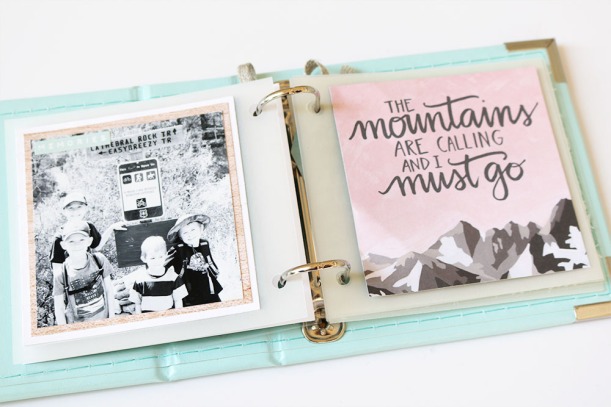
I love see through pages and wanted to include another one in the book.  For this one I used a printed sheet of acetate and layered a few embellishments on top.  This way you can still see the photo through the acetate but till you turn the page you can’t see all the details.

TakeAHike-5

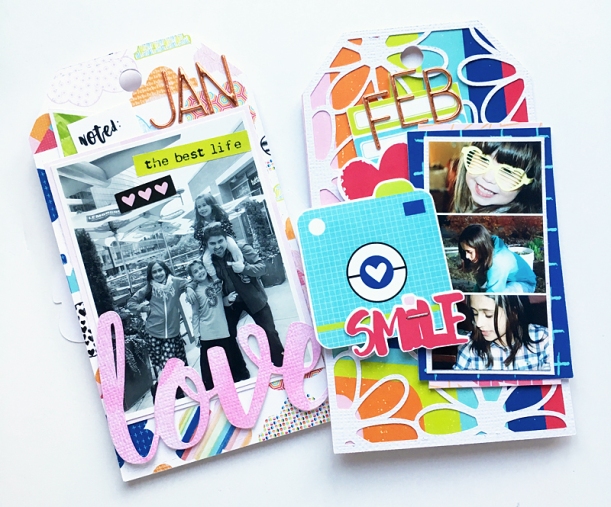
To add just a little more detail to the photos,  I added a word strip on the edge of all the 3×3 photo stacks.

TakeAHike-6

On the next page I added a little journaling and die cuts along with an epoxy arrow from the kit.  I adore the little arrows with the map on them!

TakeAHike-7

I wanted the last photo to be covered so I added a full 4×4 card to this page to make sure that the final photo was not seen till the page was turned.

TakeAHike-8

I ended the mini with a photo of our youngest son.  I layered a tag over the photo and added a little burlap bow to mimic the burlap bow at the beginning of the album.

TakeAHike-9

I love how the little mini album turned out.  I am planning on giving it to my husband to keep in his office.  Such a fun and simple project but so meaningful!  This is what memory keeping is all about!

Thanks for stopping by today!  Have a wonderful day!

Candace


4 Comments

Locker Room: Enjoy the Journey Card

Hi friends,

Melissa here with you again and I’m sharing the second, of four, projects I have made using the stunning September Sundance kit.

I love Locker Room posts! The title always reminds me of half time at a football game (totally appropriate right now since it’s football season GO HAWKS!) and the coach is getting every one fired up again… whether it’s because the team needs a kick in the toosh or maybe they are rocking it out and don’t want to lose steam. So… this type of post always has me wanting to give you a pep talk! Maybe you have no mojo… maybe you are going strong… whatever it is, I hope that I can just provide with a couple more tools for your creative toolbox and how to make the most of your kit!

Here we go!

20170812_192448

I know, I know. This looks like the makings of an Art Studio post but, it’s not. This piece of cardstock was a booboo. I messed up with my ink for another project. Almost threw it out but, noticed the colors went perfect with the papers in this kit. So, I added a few more splatters and decided to use it as my cardstock base. See? Even our “mess ups” end up useful! Don’t throw them out just yet!

20170812_220537

Alright, so this next part has a lot to share. One of the ways I love taking on a new perspective and/or stretching my product is to look at what I can fussy cut. The flowers and leaves were so perfect to do this with! It definitely helps to utilize every single part of the kit. I also wanted to incorporate one of the cut files. I love how cut files can add more to the projects and, the best part? You never run out! I’m also going to be using some of the stickers on this card and those fun alpha stickers.

20170812_220858

I want to point out something with this card, so far. When I use mists and inks on my cardbase, I notice that I use less product. Why? Because the inks provide a couple of things… texture and color. That way, I can bring in a little pop of something with the pattern papers and embellishments but, not too much. The result is my product/kit lasts longer! And I can make more! Which is exciting when I love the collection and papers and all that! Yay!

Here is the final card with the finished sentiment and embellishments…

20170812_221134


melissae_cksept17_journey1

Thanks for swinging by today! Head over to the shop to see more of the September Sundance kit, as well as, the ala carte shop for all the beautiful add-ons you can get! Use code melissa10 at checkout and save 10% on your order!

Until next time…

ck_dt17-headshots-melissa


1 Comment

Locker Room: How to make a Shaker Card

Hello, Friends! Maryám here to share my last project using the beautiful Malibu 2017 kit. I still have a lot pieces from the kit, so I’m going to continue making more layouts with my kit. For today’s project, I’m going to show you how to make a shaker card.

I love shaker cards, and when I saw the beautiful sequin mix that came with the kit, I knew it would be the perfect opportunity to do it.

Here is the card I made:

Here are some close-ups of the card: Don’t you think the sequins look perfect?


Here is the process video of my card. So, if you want to learn how to make a shaker card, please watch the video:


I hope you liked my project. If you have any question, please put them down below.

Have a wonderful day!

Maryám.


1 Comment

Yearbook | MY SUMMER JOURNAL

Hello everyone!

I am back today with my final post using the beautiful and super colorful MALIBU TN kit.  If you haven’t checked the kit completely, then just click here -to be taken to the Clique Kits website-, and you could see the entire kit and add ons.

Malibu TN kit

I have kept a journal/diary since i was a small kid.  Through the years the format has changed, but I fell in love with TNs a few years back, and used them as my form of memory keeping/Project Life.   So I thought, I will share with you how i have incorporated the Malibu TN kit to some of my daily TN entries.

CK_NATHALIE DESOUSA_AUGUST2017_MY PERSONAL JOURNAL-3

We are babysitting my littles for the summer, so I had to snap a picture of the kids and my daughter as they enjoy some summer movie fun.   I converted it to b/w so that it can easily fit into the spread without clashing with the colors in the papers.  Next, I cut one of the papers from the Pink Paislee’s Summer Lights collection to about a 1/2in taller than the picture.  I cut the paper so that it could easily fit into the 2 pages of the spread, and then added my picture at the end of the paper.

CK_NATHALIE DESOUSA_AUGUST2017_MY PERSONAL JOURNAL-4

To balance the page, I cut some of the leftover pieces from the papers in the MALIBU kit (i am down to scraps of papers after all this projects!), and created banners. They all were attached to the top of the page, above the picture, in a cluster with a little piece of washi tape from my stash.

CK_NATHALIE DESOUSA_AUGUST2017_MY PERSONAL JOURNAL-2

The typed journal lines balanced the spread, and a few embellishments made from the  papers, stickers, and exclusive printables from this month’s Malibu kit complete this page.  So simple and quick to put together.

CK_NATHALIE DESOUSA_AUGUST2017_MY PERSONAL JOURNAL-5

Next,  i used this striped paper from the Summer Lights collection (featured in this month’s Malibu TN kit) as it reminded me of a beach towel.

CK_NATHALIE DESOUSA_AUGUST2017_MY PERSONAL JOURNAL-7

This time, I used the entire 6×6 paper sheet to cover the center of the 2 page TN spread. I cut the paper so that it fit on both pages, and glued a picture of the 2 girls to the top corner of the paper.  I added a small piece of another paper to mat the picture, and make sure it pops from the busy background. a few fussy cut images from the CK Exclusive printables, and the papers  along with the swim suit chipboard sticker is all that was needed to  frame the picture.

CK_NATHALIE DESOUSA_AUGUST2017_MY PERSONAL JOURNAL-8

I used my editing software to enlarge some of this month’s exclusive printables.   In this particular page, I chose to add my sentiment inside the hexagon.  I am loving the alphas from last month’s POOL PARTY kit.  The color matched this month’s kit also.

CK_NATHALIE DESOUSA_AUGUST2017_MY PERSONAL JOURNAL-6

Here is the final layout.   I love how easy it came together, and all the color in the page -even in the journal lines… the neon pens included in the kit will steal your heart, too!  I hope you all are ready to use the MALIBU KITS to document your summer adventures.  There are a few available at the Clique Store, so make sure you can get your hands on one of them… You will love it!

Remember to leave me a comment if you have questions on how this came together, or just to say hi!

Take care!

CK_DT17-headshots-Nathalie


4 Comments

Locker Room: Summer 17′

Hello, friends! Maryám here again to share another layout made using the Malibu kit 2017. For the main element of my layout, I used an old cut file from CK and I cut it on the paper N°8 with my Silhouette Cameo, and then I added some hand-stitching to it.

Here is the result: What I’ve done basically was add a bunch of embellishments around the wreath, then put my photo, the journaling and at the end add some watercolor splatters. You will see the haul of the process in the video at the end of the post.

Here are some close-ups:

Here is the process video. If you have any questions just let me know.

Thanks for stopping by today.

Have a wonderful day!


3 Comments

Locker Room | THE OCEAN IS CALLING

CK- Locker Room - header

Hi Clique Kits fans!!

I am back today with a new project using the beautiful MALIBU TN kit,  what can I say, the Pink Paislee’s Summer Lights collection is gorgeous, and all the add ons are perfect to document summer, and those special beach adventures.

Malibu TN kit

I love this kit, and it is ideal to document some of the pictures from our beach adventures down in Ecuador.  Here is a small video on how this page came together, so sit down and enjoy!:

The starting point for this layout were the exclusive cut files from last year’s summer and August kits.  Once I had cut them on white cardstock, i wanted to add color to the page, something very summery and bright.

CK_NATHALIE DESOUSA_AUGUST2017_THE OCEAN IS CALLING

Using a combination of heavy acrylic paint, i dragged the paint across white cardstock, and soften the look of the streaks with a large brush, and a baby wipe.  Then stitched the page to one of the Elle’s Studio papers from last month’s POOL PARTY KIT.

CK_NATHALIE DESOUSA_AUGUST2017_THE OCEAN IS CALLING-4

The ring cut out also was sewn to the page, and then i used the Pink Paislee papers from the Malibu TN kit to back the flower cut out.  I love the rich colors in the papers, and how they contrast beautifully against the bright background.

CK_NATHALIE DESOUSA_AUGUST2017_THE OCEAN IS CALLING-5

The flowers were then attached to the background using a bit of foam adhesive.   I positioned them so that they were framed by the long leaves from the ring cut out.

CK_NATHALIE DESOUSA_AUGUST2017_THE OCEAN IS CALLING-6

I added the long leaves from the Fancy Pants  Hello Sunshine ephemera pack included in this month’s kit.   The title for this page comes from Pink Paislee’s Summer Lights ephemera pack -which can be found in the Malibu Main Kit -.

CK_NATHALIE DESOUSA_AUGUST2017_THE OCEAN IS CALLING-7

The picture of my daughter admiring the sunset over the Pacific Ocean fit into this page seamlessly.  A few of the embellishments from the kit, and the sticker sheet available at the Clique Store create the cluster on the page.  After a few sprinkles of gold ink, the page was completed:

CK_NATHALIE DESOUSA_AUGUST2017_THE OCEAN IS CALLING-3

I love this page, the colors of the papers in the Malibu TN kit matched the bright green color of the background, and bring the eye to the subject of the page.  It was so easy to complete the page using the  kit, and a few of the exclusive cut files available at the Digital Store.  There is a lot of goodies available at the store, so take some time to visit it to check them all out.

Remember to contact me, if you have a question about how this page came together.

See you all around!

CK_DT17-headshots-Nathalie


2 Comments

Locker Room-Sunset


Hi everyone!  Aren’t you in LOVE with the August Kit, Malibu?  I love the soft, watercolor look along with some of the brighter neon colors!

I have a whole bunch of sunset photos that I sometimes have a hard time scrapping because the colors are so vibrant (and there are a lot of colors), but I don’t want to take away from the photo by adding too many other distracting elements and patterns on my page.  But this collection was PERFECT because the colors are soft and the patterns are not too bold.

I cut from sun shapes with my Silhouette Cameo from the Just Nick store and colored each sun in with watercolors to try and match the shades in the paper.  I backed each sun with some patterned paper in a similar color.

I added a few layers behind my photo, and a cluster of die cuts and chipboard pieces from the kit in the bottom left corner.

The title is fussy cut from one of the patterned papers, and I wanted to add a little iridescent bit to it, so I added in the sunglasses.

To create a visual triangle, I added some iridescent clouds and stars to the top right of the page, too. And for a finishing touch, a few exclusive sequins scattered around, too!


What photos will you use with this sot, colorful kit??


2 Comments

Locker Room – Mini Album

CK- Locker Room - header
Hello everyone! Enza here with a mini album to share with you today using the beautiful July Pool Party Travelers Notebook kit.

ck-jun17-tnkit2_4_orig

egudor_July17_LockerRoom_Full
The idea for my mini was to have a 2017 album with only one picture per month. I do this a lot. I use the same concept for my TN. I think it’s fun to look at random pictures and get a feel of how our life is/was during that given year. You will also notice there is no journaling. The reason for it is that I usually include the full stories in our Project Life albums. Sometimes I just want to look at pictures and pretty papers 🙂
egudor_July17_LockerRoom_Cover
The 4×6 cards from the Ain’t Life Grand collection included in the kit are just the right size. I started by cutting a few tag shapes from different patterned papers and adhered them back to back. I love how thick the papers are. There is no need to add extra cardstock in between the layers to make your pages stronger, which saves time and money 😉 Once all my pages were ready, I embellished them with a variety of elements. A mix of ephemera pieces, exclusive cut files and printables from the Clique store, and some stitching added that layered, unique look I love.

Here is the front:

egudor_July17_LockerRoom_Front

Here is the back:
egudor_July17_LockerRoom_Back
The alpha stickers I used were included in the June Aquarelle kit. The copper color coordinates perfectly with the Pool Party TN kit.
egudor_July17_LockerRoom_CloseUp6
Some of the cut files were modified to fit the tag shape. Same idea was used for a couple of pictures, as well as the 3×4 cards that come in the kit. I just adhered them back to back, cut the top corners, and punched a hole to fit the other tags.
egudor_July17_LockerRoom_CloseUp3

egudor_July17_LockerRoom_CloseUp5

egudor_July17_LockerRoom_CloseUp1
egudor_July17_LockerRoom_CloseUp2
I hope you enjoyed reading about my process and will maybe use your Traveler’s Notebook kit to make a fun and colorful mini album.

Until next time. Have a lovely day!

Enza


1 Comment

Locker Room with Evi // Happy Home

Hello Scrappy Peeps! And a Happy 4th of July!! Its Evi here for Locker Room Tuesday.  For todays post I am playing with the wonderful May kit which is still available for your scrapping pleasure in the Clique Kit store.  This kit featured the Pink Fresh Studio Dream On collection with these soft pastel color range.  I wanted to challenge myself to use a tool I rarely grab for, my punches.

I had parts of this kit left since I did use most of it last month.  I have circle punches in a variety of sizes in my stash, so I punched out 2″ , 1.5″ and 1″ circles and rings with all the patterned paper I had left over.

I used my Scotch Tachy glue to adhere all these circles in a diagonal arrangement for my layout.

I used the puffy stickers and alphas in the kit for my title and a few more bits around the photo of my family to finish off the layout.  Thank you for joining me and if you did not get this kit they are still available in the shop.

I have a process video below to watch this layout unfold.


1 Comment

Locker Room: Use Those Scraps

CK- Locker Room - header

Hi friends,

Melissa here with you today with my last cards created using the beautiful June Aquarelle kit. This is a Locker Room post which, for me, dreams up half time. You know, it’s the Super Bowl and the teams are playing their game. Maybe one team just needs that extra pep talk to keep the energy flowing. That talk may contain some new inspiration that keeps the game fresh. So, that’s what we’re doing today. June is drawing to a close and the July kit is ready for you BUT, I know you still have some scraps and leftover embellies to use. So, let’s have a pep talk and I’ll give you some fresh ideas for how to use them all up on a card.

I am also sharing a process video with all the juicy details. Here are the two cards I’m sharing in the video…

Sparkle1

Hello1

Alright, to see all the ideas and tips on how I created these two cards, I want to invite you to check out the Cards with Melissa video below and happy creating!


ck_dt17-headshots-melissa