Clique Kits

Click. Connect. Create.


2 Comments

Geek Lab – Free Cut File Fun

Hello Clique Fans!  Erica here with you today to share a layout using some of the July Travelers Notebook kit and a free cut file we offered back in May!  This kit features the Ain’t Life Grand collection from Pretty Little Studio designed by Ashley Horton.  I also printed out the exclusive Travelers Notebook printables sheet that comes free for subscribers!

This cut file was designed by Maryam Perez for our May Challenge and I just love it!  You can grab it for free HERE.  You can also check out our Facebook group The Clique for even more free cut files!  I started out by picking a few papers from the kit and cutting them down to back the cutfile.

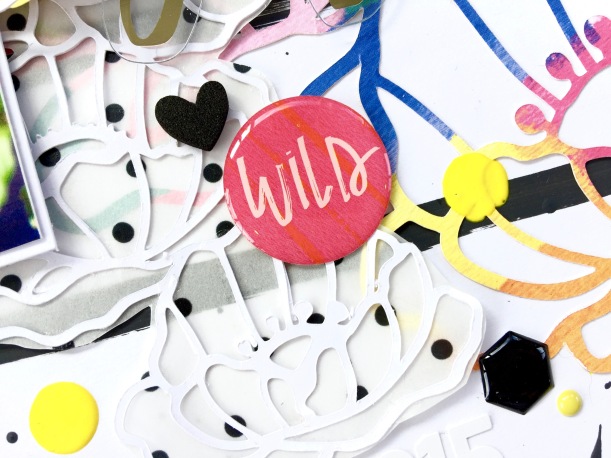
I used my Tombow Aqua adhesive to add the cut up papers to my cutfile!  I did not back all of the open spots because I wanted to leave some white spaces!  I love how it turned out!

The photo I am using is of my two youngest boys swimming in their pool!  They love to be in the water and always have so much fun!

Once I backed my photo with a couple layers I added it to my layout and began embellishing my layout!  I used products from the kit and also so Ain’t Life Grand products that I picked up in the Pretty Little Studio shop!  Clique Kits loves to support women in business and small business and PLS is one of our favorites!  Here is a look at my completed layout using the July Travelers Notebook Kit!

Clique Kits has a handful of freebies in the digital shop as well that you should check out!  Using cutfiles for your layouts or cards is a fun way to use up smaller papers and add lots of patterns!  Remember if you use CK files in your projects to tag us on Facebook or Instagram!  We love to see what everyone is creating!  Thanks so much for stopping by today and I hope you all have a wonderful weekend!


6 Comments

Geek Lab with Hannah

Blog Image_Geek Lab

Aloha!! It’s Hannah here with you today.  The fresh and bold colors in the “Jelly Bean” April Kit have me thinking about Spring. Where I live it’s still pretty green and damp. It has me dreaming about my flower bed from the summer and all the beautiful colors they wore proudly. I knew this kit and the exclusive flower cut file would fit perfectly together to make an awesome layout.

Maybe by making a layout about my flowers will entice them to grow faster! If only scrapbooking brought on the season change and made the weather behave?!! While I dream about wearing old sneakers and dirty garden gloves, lets take a look at what I created.

IMG_3751

I really wanted to go BOLD so I used my silhouette to cut the exclusive floral cut file with pattern paper. The cut file is really intricate so it really helps this busy paper pop. The flowers come alive. It will work well on my layout because I am using white cardstock that I made several stripes with dark grey acrylic paint. The color against the dark and white really help them stand out.

I cut one set of flowers big and left them open. I also cut a couple of other sets in plain white cardstock.  I like to use smooth cardstock with my cut files. I find they look better and the thicker quality helps them hold up better in the silhouette. These smaller sets I backed with some of my left over “Paint Me” patterned paper and some of the dotted vellum. I used some tiny staples in gold from my tiny attacher to attach and hold the paper together. I wanted to create shadows by attaching them this way. I wanted the cut file to lift up a bit from the paper to add dimension too.

To me this really helps makes an impact on a layout when you use dimension and shadows in your favor. The bright colors in this kit and paper really help with that as well.

I used 3 3×4 size photos that I matted with white cardstock. With all the color in the cut file and in my photos I didn’t want to go crazy. I also knew I would finish off the layout with some splatters of the Shimmerz Acri-tonez Paints.

IMG_3761

I added a couple of the cut aparts from the “Daily Details” Paper for some extra layers. I love the writing on them it’s so fun and said perfectly how I felt. The gold foil on some of the cards is gorgeous and I couldn’t help myself not to use that on this layout.

I lightly embellished this page. The color and intricacy of the cut file really helped fill the page up. I used a few of the Freckled Fawn foam word phrase stickers. They are really fun. I also added some of the Bella Blvd Puffy Stickers and Epoxy Stickers from the Clique Store.  These stickers add just the right amount of extra color to tie my layout together.

IMG_3762

For the title I used the Elle Studio White Alphas and one of the Heidi Swapp Acetate words in gold. I love when I have word phrases in my kits to help me with my title. I don’t really mind if I don’t have the most thought out title. As long as it helps capture the feelings I have when I see my photo that’s all that matters to me. I know I will have journaling somewhere on my layout eventually so my family and I can remember all my thoughts about these photos.

Though truth be told, I just really enjoy taking photos of my gorgeous flowers. They are all mine and they are beautiful! I just want to remember how beautiful they are, especially during the middle of the winter when it has been raining for ten days straight and you can see your breathe when you wake up in the morning. It’s times like this I want to remember there is color and beauty that grows right in my own back yard. I don’t need a fancy title this time for that!

IMG_3763

To finish off my layout I added Freckled Fawn enamel dots and shapes around my cut file. That is intact what I want my eye to go to first when I look at this layout. I added the year for a date with more of the White Alphas by Elles Studio. Since the date really isn’t important I don’t need it to stand out. I also finished by adding splatters with the Shimmerz Acri-tonez Paints. I just let the paint fall out of the bottle as I lightly squeezed it. I really love the look it gave adding them this way. The paint made really raised spots around my layout and have great dimension. I made sure I put my layout off to the side while it dried so the paint didn’t get touched, or settle down.

CK Full Layout Footer

I hope you are inspired today to create different looks using just one cut file. It really makes a cut file be versatile when you can get different looks just by changing a few things, like color, shape and what is behind the cut file itself.

Have a great day and I hope you are excited about playing with your April “Jelly Bean” Kit when it shows up at your door. When it does arrive be sure to tag us and share what you creating with your kit!!

Also Check Out my Process Video on the Clique Kits Youtube Channel for more details on how I made this fun layout.

CK_DT17-Signatures-Hannah


9 Comments

Study Hall : Layout with Hidden Picture

studyhall

Hello everybody, how are you today? Caroli here, and on this Sunday I want to share with you my first project using the fabulous April kit Origins, which features beautiful collection Life in Color by Simple Stories.


I love all the flowers and spring feeling of this kit, as soon as I saw it I thought it would be perfect for scrapping some pics of myself and my little daughter wearing flowers crowns during a pregnancy photoshoot we had last January.

The paper with a flower arrangement on the bottom right was just perfect for the idea I had in mind: using a big pic of us and hide something behind it, some kind of “interactive” layout.

cliquekits_simplestories_carolischulz_april4


As you can see, I cut a lot of flowers from different papers in the kit and used them to create layer of embellishments on my layout in combination with some pieces of the ephemera set, also included on the kit.

cliquekits_simplestories_carolischulz_april2

cliquekits_simplestories_carolischulz_april3

I also used these cute leaves I cut sing the exclusive cutfiles included on the kit. Although the original files was some kind of background, I ungroup it and used just the leaves in my layout, they are the perfect match for the flowers!

As I said, my idea was to hide the journaling behind the big pic, because I wanted to write some deep feelings and thoughts for my daughter regarding my pregnancy, so I used a piece of patterned paper as a base for the main cluster and below it I put another pic and my journaling.

cliquekits_simplestories_carolischulz_april5


Of course I added few more flowers on the second pic and also more leaves, it’s quite simple but I love the effect of both together.

cliquekits_simplestories_carolischulz_april6


I love the clear stickers of this collection included on the kit, they come in black, silver and colors and are great for adding tiny details and make your project more interesting. In this case I used some phrases and a heart in black, they are so tiny and so cute! I also used a yellow enamel heart by Bella Blvd., I love those enamel hearts! Good thing they are also included on the kit 🙂

cliquekits_simplestories_carolischulz_april7


Finally, for the title I used this black alpha by Bella Blvd. included on th kit and silver Thickers from my stash. I love the touches of silver of this collection, I think silver goes perfect with bright colors and spring theme, don´t you think?
I complemented my title with the rounded letters included on the alpha sheet by Bella Blvd. I like the idea of combining different fonts and alphas on the titles of my layouts, this make them more interesting!

cliquekits_simplestories_carolischulz_april8


Here is the final result, such a simple, colorful and very flowery layout documenting an important memory and expressing all my love to my little girl. These are some of my fave pictures ever and I’m glad I got to document this memory using my kit, it’s the perfect frame!

cliquekits_simplestories_carolischulz_april


I hope you liked this simple idea and use it to document a special memory. Thank you for joining us, have a happy Sunday!caroli_schulz


8 Comments

Geek Lab: Celebrate Everyday

geeklab

Hello everyone! Donna here to share another layout using the fun January kit Alegria featuring Fancy Pants Designs Happy Place.

7589276_orig

But first, let me share a little bit of photo editing. I am using an old version of Adobe Photoshop (CS3) but I am pretty sure you can do the same steps in higher (or even much lower) versions of PS.

Every January, our family and friends gather for a little thanksgiving celebration. And I look forward to it because that’s when hubby and I started having our family photo with our daughter. This year is the second one. I have another layout using the photo from last year that I will be posting on my blog.

This is the photo I used. Notice the little green and white specs on hubby’s face and shirt? That’s what I edited out. There were strobe lights in the party that’s why there were green little specks on our faces etc.

photo1

Open your photo and duplicate. Then click the healing brush tool option. You will have to choose the brush size depending on the size of what you want to clear or edit out. The white specks on hubby’s shirt were little bit small so I chose a small round brush tip (solid, 100% opacity). While holding the Alt key (Windows), choose an area you want to “Copy” onto the little white specks. Then click on the specks.


photo4

Next was the green speck on hubby’s face. Click the healing brush tool option again and select “Patch Tool” this time. You will encircle the area you want to fix. Then move your cursor to the area where it’s clear and drag it to the area to be fixed. Make sure the area you are copying from has the same color or texture to the area you are fixing.

photo2

I also fixed the black circles under my eyes and the greenish spot on DD’s forehead. Duplicate the photo again. Let’s do my eyes first. Using the Patch Tool again, I circled around the area under my eyes where the dark circles were. Then I just dragged the cursor to my forehead where t’s clear and can be copied to the area I want to fix. Do one eye first then the next eye. Now, once the dark circles were covered, lower the opacity of the “duplicate copy” of the image. I did mine around 35%. This way, my face won’t look too Photoshopped lol! I just slighly lighten the dark circles. Then I did DD’s forehead next using the Patch Tool as well but didn’t lower the opacity anymore.

photo3

And here is the photo on the layout I made

DonnaEspiritu-CKAlegria-layout04

some close up shotsDonnaEspiritu-CKAlegria-layout04a

DonnaEspiritu-CKAlegria-layout04b

That’s all from me today! I hope you liked my page and the simple tutorial I shared.

Thanks for dropping by!
Happy crafting,

CK_VarsityTeam15-16_Donna


17 Comments

Art Studio – Cut Files and Water Colour Play

blog-image_art-studio

Hello it’s Melissa here and today I have a 12×12 layout to share with you that I made with the gorgeous Tapestry Kit.  I decided to play with my water color paints and some of the exclusive Clique Kits cut files (which, by the way, are seriously amazing!).  Now I am by no means a mixed media expert, but I do love to experiment and play!

I used the background squares cut file and the solid feather cut file, and wanted to feature them in a big way on my layout. I backed the squares cut file with the navy and teal constellation paper, and then machine stitched on the diagonal.  Everything else was built on this cut file.
Pregnant Selfie1A little bit about my photo, yes it is a pregnancy photo, but no you can’t see my baby bump!  It’s a quick selfie that I took at our neighbourhood park, and this layout is for my pregnancy album (my baby was born in April 2014, and this photo was taken in March).

I coloured my feathers with pink and red water colours, and I made them darker at the bottom, fading out to the top in a gradient or ombre.  Once they were dry I splattered them with pink and rose Colour Shine.  The edges naturally curled up from being wet, and I left them like this.

Pregnant Selfie Sneak

The cut apart tag from Wildflowers was perfect for my journalling, and I added the one of the exclusive printables “thankful & grateful” and a Wildflowers pleather bow – which are stunning (and are an add on to the kit).

Pregnant Selfie2

The Dear Lizzy gold puffy thickers are amazing, and are such a perfect match for this kit!  Here is a close up of the water colours I applied with the packaging technique (you can see this technique in action in my video).

Pregnant Selfie3

A close up of my layering under my photo.  The flower die cut is from Pink Paislee’s Cedar Lane ephemera pack (you can find it in the shop as an add on).

Pregnant Selfie4To see my process in detail, you can watch my video below.

Thanks so much for looking, I’ve loved my first month on the blog!

Love & blessings xxx

CK_DT1516_Siggies_Melissa


21 Comments

Art Studio: Mac Love Layout

artstudioheader

Hello everyone! Leigh here, to bring you a “sweet” layout about our current favorite sweet treats, macarons!

What’s your favorite sweet treat? It was so fun to make this layout about our family’s fave, and I used the Faber Castell Whipped Spackle and Pink Gumball Ranger Paint Dabber from the Clique Kits Store, to resemble frosting.

LOdynski_Oct15_15MacLove900px

Love these Pinkfresh Studio papers!

LOdynski_Oct15_15MacLoveTut1900px

You can cut the exclusive cut files for October on standard office supply transparency film to create your own stencil to use over and over again. I label mine with washi tape and back with black card stock for added durability, and to make them easier to see!

LOdynski_Oct15_15MacLoveTut2900px

Use a palette knife to spread your Whipped Spackle on like frosting!

LOdynski_Oct15_15_MacLoveTut3

Add the Pink Gumball paint, it’s really easy with this dabber topped paint.

LOdynski_Oct15_15_MacLoveTut4900px

Use a craft knife or paper trimmer to trim out 3 inch by 3 inch patterned card stock diamonds as desired.

LOdynski_Oct_15_15MacLoveSneakPeek2900px

I printed my photos out at 2.75 inches so I could back them with a 3 inch vellum piece.

LOdynski_oct_15_15MacLoveSneakPeek1900px

Cut out your cut-a-parts and add your favorite embellies from the October kit, and have fun!

CK_Oct15-Kit

This layout was made with the Clique Kits exclusive cut files, Faber Castell Whipped Spackle, Pink Gumball Ranger Paint Dabber available in the Clique Kits Store, and the October Funfetti Kit! Thank you for joining us here today!

CK_DT1516_Siggies_Leigh Ann


9 Comments

Locker Room: Hey! Awesome

blog-image_locker-room

Hello! Donna here to share another fun tutorial with you all.

My layout was inspired by one of the papers in the kit. I created my layout around this piece of paper.

DonnaEspiritu-CK-October05-tut01

I cut the squares I wanted to use and then made the other side as mat to some of the cut outs.

DonnaEspiritu-CK-October05-tut02

I used a couple of gelatos to color the white cardstock. I didn’t pay attention that much if the squares were equal since I will cover them later anyway. I splattered some as well using the same brush.

DonnaEspiritu-CK-October05-tut03

Then I used my jet black gouache to add black splatters. I cut a half an inch around the white cardstock and mounted on a black cardstock.

DonnaEspiritu-CK-October05-tut05

After adhering everything, I decided to splatter some more black gouache. To spare the photo from unwanted black splatters, I covered it with a piece of small plastic. Any cover will do.

DonnaEspiritu-CK-October05-tut06

Carefully lift the cover.

DonnaEspiritu-CK-October05-tut07

For a finishing touch, I doodled some scallops using a black pen. I would suggest waiting a bit more for the splatters to dry. I ended up with smudged splatters when I doodled around the page… patience is not my virtue lol!

DonnaEspiritu-CK-October05-tut08

This is how my page turned out.

DonnaEspiritu-CK-October05

More detailed shots.

DonnaEspiritu-CK-October05b DonnaEspiritu-CK-October05c DonnaEspiritu-CK-October05d DonnaEspiritu-CK-October05e

That’s it for now, thanks for dropping by!
Happy crafting!
CK_DT1516_Siggies_Donna


10 Comments

August Clique Kits Pep Rally

Hi everybody. It’s Nicole here, wishing you a fabulous Wednesday! Welcome to the August Pep Rally. This month, we hope to inspire you with a variety of projects using  pieces of the Pink Paislee’s “Citrus Bliss” collection. I think this kit is fruit-tastic! What do you think?

For our challenge this month, we went with an “Anything Goes”, so I decided to challenge myself to use the exclusive cut file and printables in this month’s kit. Believe it or not, this layout took me over an hour to create. I just couldn’t decide what I wanted to do with the cut file and printables, but in the end, it came together nicely.

The Pep Rally, for those of you who are new to the Clique, is our monthly subscriber and design team blog share typically held the third week of the month and participants earn product credits-yes, free stuff to do what you love-who can beat that? It’s out with the old, in with the new time at Clique Kits when we (hopefully) have all killed our kit from the previous month and have lots to show off, and we start to chat and hype the excitement for the coming month’s kit. In other words, we party! We don’t leave out our guests-there is always a prize for a hopper who comments on each post and likes and shares on social media! Just leave a new comment for each like and share for a separate entry in the random drawing for this month’s prize. One lucky person will win this month’s Ambrosia kit that is sold out! Get the word out and have your friends join our Pep Rally because they might end up with this gorgeous kit at their doorsteps!

Here’s today’s line up:

 
Feel free to hop in any order, if you get lost, you can always come back here to find your place. For this layout, I printed my printables on white cardstock and hand-cut them out. For the cut file, I used a spray adhesive (E6000 Spray Adhesive) to adhere It to my layout since the letters are thin. It worked like a charm. If you look closely, I snuck something from the September Kit on this layout. 🙂

Now, hop along and see what our design team and subscribers have been working on. Don’t forget to check out the gallery on the website landing page featuring our Varsity Team (design team) projects using the August kit and check out the Monthly Kit page for all the details about next month’s amazing Clique Kit Ambrosia. Take care!


9 Comments

Geek Lab: Living the Dream

Blog Image_Geek Lab

Hello everyone! Allie here today, and I’m sharing a fun page about my husband using the gorgeous May kit! I love all the fun and happy color, and I think the name “Carnival” is perfect. There are so many gorgeous paper and embellishments included, and I wanted to cram them all on every page! I restrained myself, but I did make lots of pages using as many paper as possible, including this one:

Living the Dream_Amy Tangerine_Allie Stewart_Layout

To create this layout, I used the exclusive May background cut file. I decided to manipulate the cut file to suit the design I had in mind, and I have a tutorial showing how you can do this too! Side note: I love this picture of my husband! He came to visit me at work and he ended up with three cups of Starbucks. I just had to take a picture because it was too funny!

First, open the cut file in Silhouette Studio.

Capture1

Next, click on “Edit Points” button in the top right corner (the arrow with the dots).

Capture3

Once the “Edit Points” button has been selected, click on the point in your cut file that you’d like to delete. It should look something like this:

Capture4

Next, click “Delete Points” until you have the shape you want.

Capture5

This is what I ended up with:

Capture6

By deleting the points around the shapes, I was able to create a background.

After I cut it out using my Silhouette, I backed the circles with scraps from my kit.

Living the Dream_Amy Tangerine_Allie Stewart_closeup-001

I love manipulating cut files, and I hope you found the explanation helpful. I think it’s a great way to get more mileage out of your cut files!

CK_VarsityTeam_Allie


6 Comments

Geek Lab || Cutting Apart Cut Files

Blog Image_Geek Lab

Hey, everyone!  Kat here today to show you how I used the awesome background cut file that comes with this month’s kit. I loved the cut file, but I was a bit intimidated by it, so I decided to cut it apart to create a nice “flow” of circles across my page.  I backed each of the circles with a different patterned paper from the kit.  I also fussy cut the circles from the Samantha patterned paper and interspersed them throughout my die cuts.

Here is my layout:

duckfaces_kat_ck

I love the end result!  You still get to experience the awesome-ness of the cut file, but I was able to use the file in a way that fits with my style – a definite win!

Do you ever cut apart your cut files to get a slightly different effect?

CK_VarsityTeam_Kat